
The Users section controls who can access the Integration Cockpit and with which permissions.
Purpose: Create user accounts, assign the appropriate role, and revoke access when it is no longer needed — without losing the account and its history.
Navigate to Settings → Operations → Users to manage user accounts.
For roles, authentication requirements and user personas, see Step 5: Add & Manage Users in the Onboarding Guide.
User Management Overview
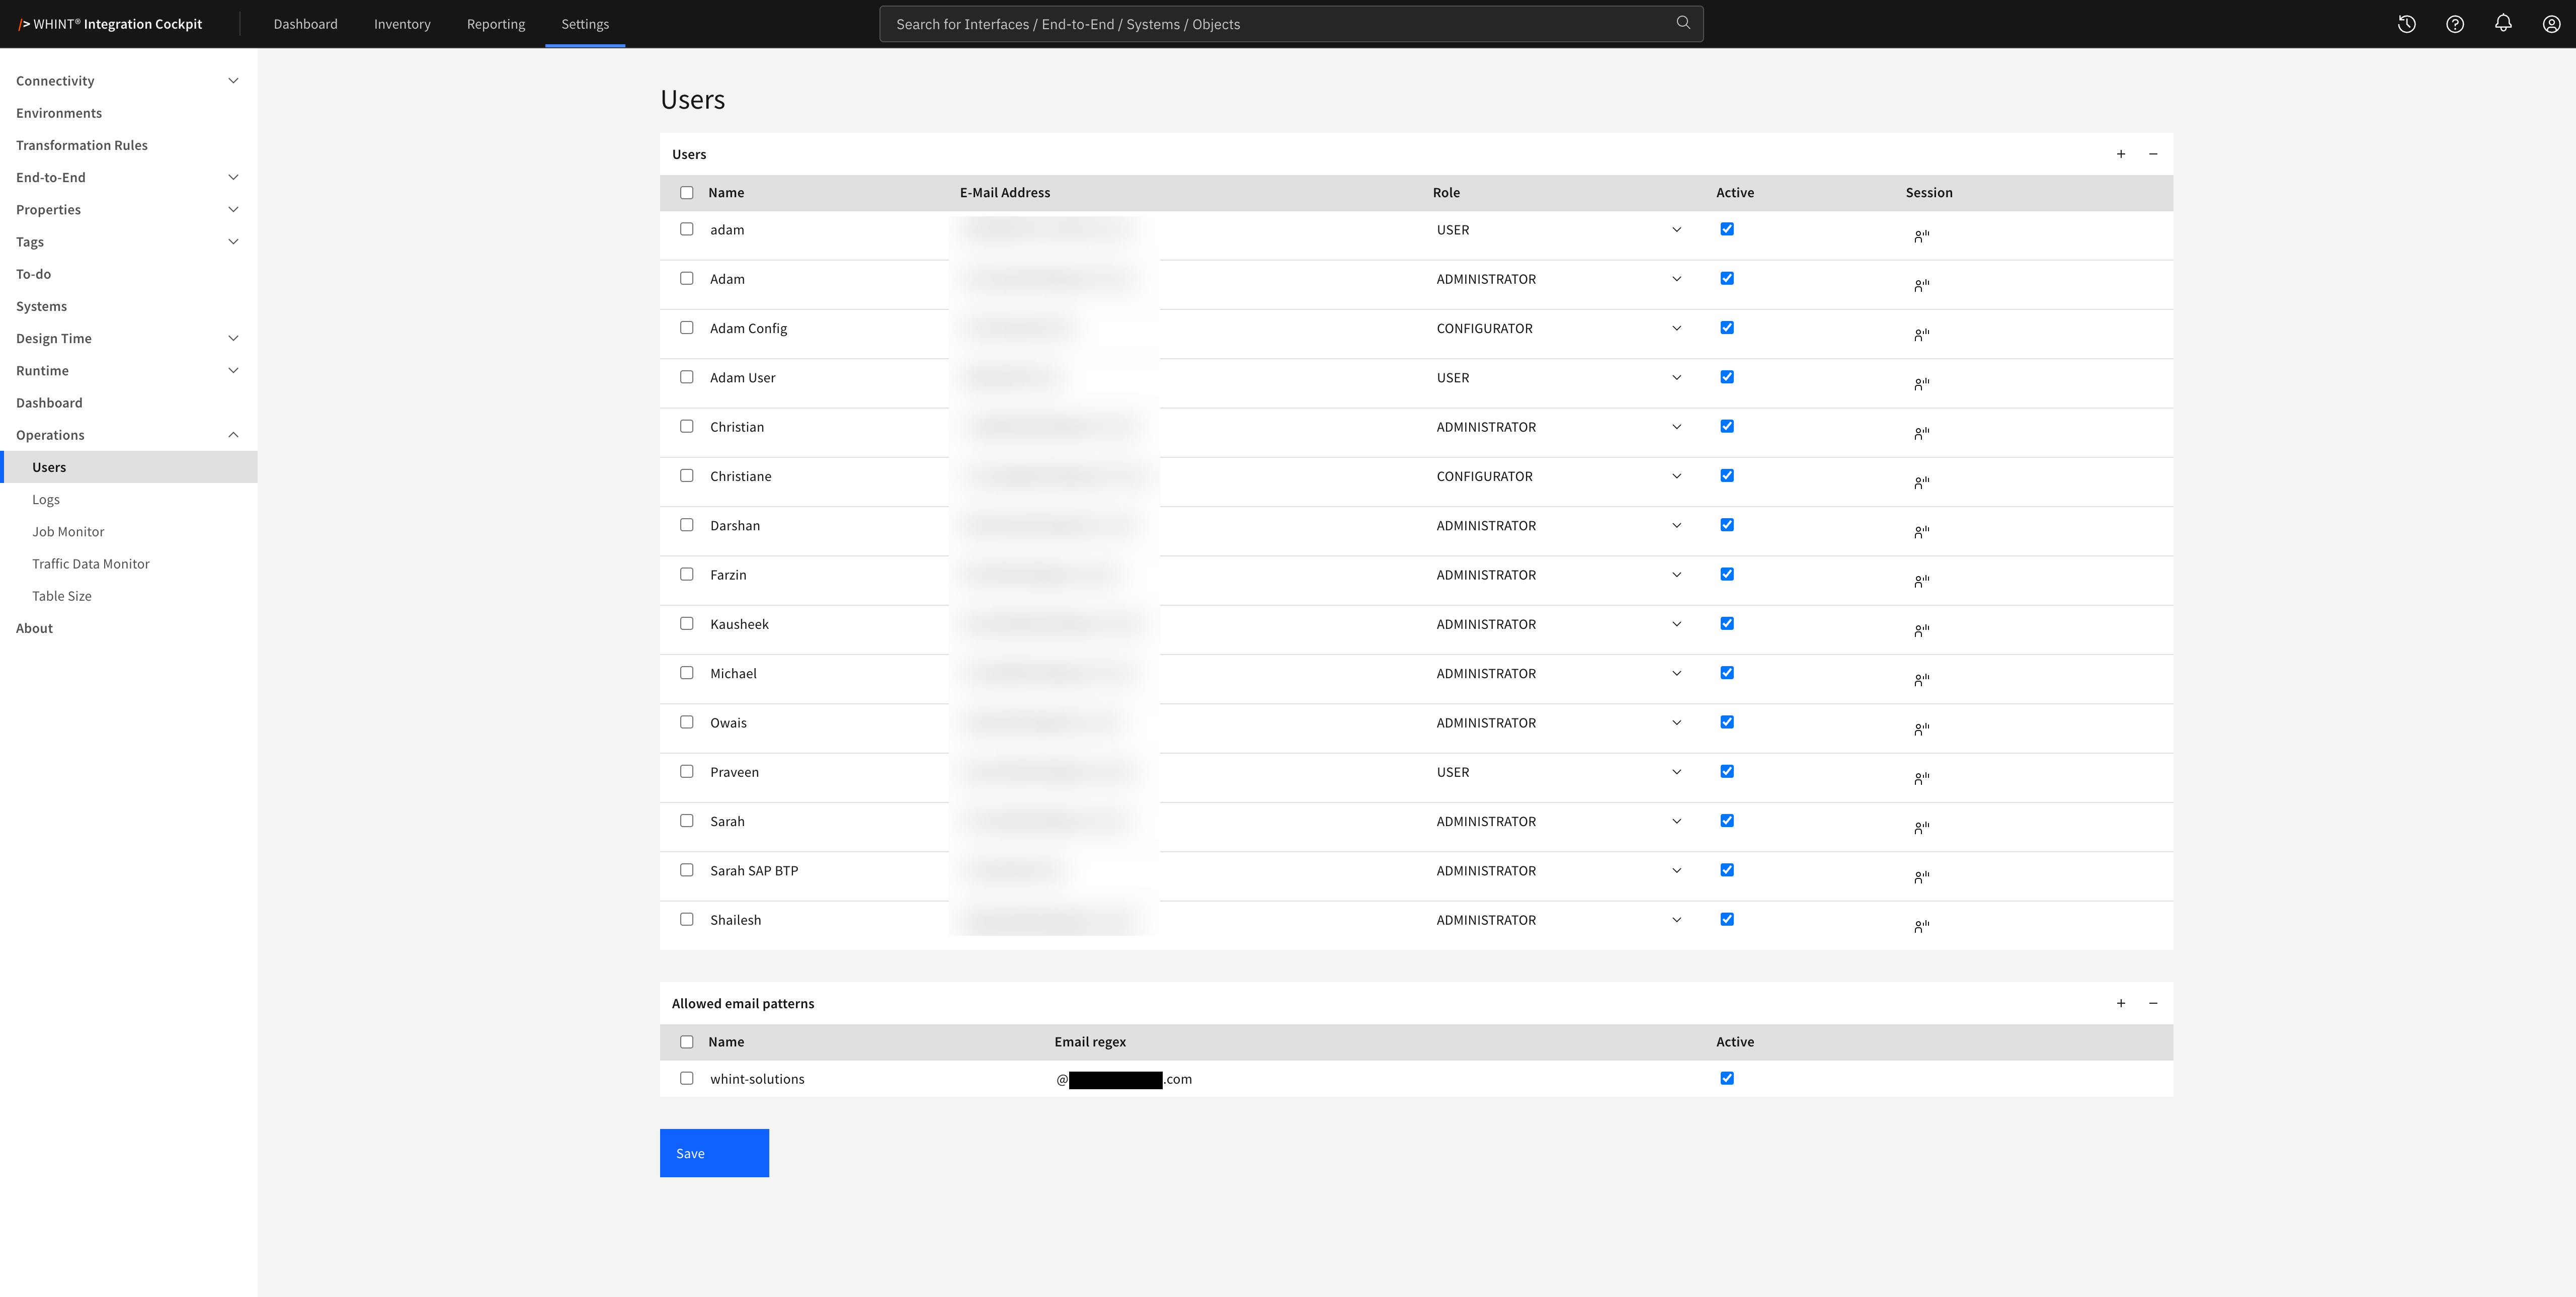
What you see:
-
Users – the user list with Name, E-Mail Address, Role, Active and Session
-
+ and – in the table header to add and remove users
-
Allowed email patterns – a read-only table showing which email domains are accepted without an individual user entry
-
Save – applies the changes to the user list
Adding a User
-
Click + in the table header of Users. A new empty row is added at the top.
-
Enter the Name and the E-Mail Address the user authenticates with.
-
Select the Role:
USER,CONFIGURATORorADMINISTRATOR. -
Select Active so the user can log in.
-
Click Save.
Validation: Name, E-Mail Address and Role are mandatory in every row.
Nothing is saved as long as a row is incomplete.
Roles
|
Role |
Permissions |
|---|---|
|
|
Read access to Dashboard, Inventory and Reporting |
|
|
Same as |
|
|
Full access, including Settings with user management and data source configuration |
Settings is only available to administrators — the menu entry is not shown to other roles.
USER and CONFIGURATOR can still personalise their own dashboard: the user menu in the top right contains Configuration with the Activate, Inventory and Arrange settings for their own account.
Managing Users
-
Change a role – select a different value in the Role dropdown
-
Revoke access – clear the Active checkbox. The account and its assignments stay, and access can be restored by selecting the checkbox again.
-
Delete a user – select the checkbox next to the row, click –, then Save
Click Save to apply the changes.
Assign the least privileged role that covers the user's task, and prefer clearing Active over deleting an account — the account remains available for re-enabling and the history stays intact.
Sessions
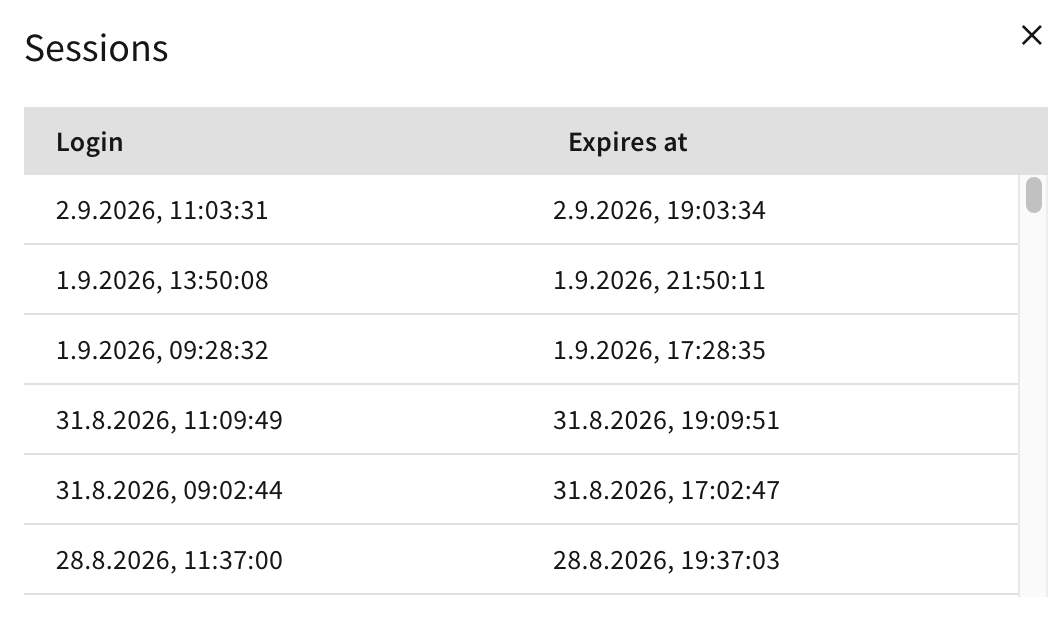
The icon in the Session column opens the Sessions dialog for that user. It lists every session with its Login time and the time it Expires at, newest first.
The dialog is read-only and shows when and how often a user has logged in.
Allowed Email Patterns
Instead of maintaining every user individually, your instance can accept all addresses of a domain. The Allowed email patterns table shows which patterns are active:
|
Column |
Content |
|---|---|
|
Name |
A label for the pattern, for example the organization it covers |
|
Email regex |
The pattern the address is matched against, for example |
|
Active |
Whether the pattern is applied |
Everyone whose email address matches an active pattern can sign in without an individual entry in the user list.
The table is read-only.
How login access is granted: Users sign in through the identity provider configured for your instance — SAP (XSUAA) or Microsoft Entra ID. The Cockpit then matches the email address returned by the identity provider against the user list and the allowed email patterns. Being able to sign in with the identity provider is not sufficient on its own: an address either has an Active entry in the user list, or it matches an active email pattern.
Related Documentation
-
Step 5: Add & Manage Users – Roles, authentication requirements and user personas
-
Dashboard (Activate) – Dashboard settings available for individual users
Last Updated: September 2, 2026